2022年hexo搭建静态博客配置备忘-next主题

本文主要介绍利用hexo框架搭建静态博客的「配置」过程,留作备忘。

主要包括环境搭建、hexo参数设定、next主题配置、第三方服务配置、自定义博客样式等部分。

Hexo 是一个快速、简洁且高效的博客框架。Hexo 使用 Markdown(或其他渲染引擎)解析文章,在几秒内,即可利用靓丽的主题生成静态网页。

版本信息

nodenpmhexohexo-clinext
版本号18.2.08.9.05.4.14.3.08.10.1

操作系统:macOS Monterey 12.4 arm64

注意:目前使用的next主题是next-theme团队在维护

项目主页(https://theme-next.js.org/),github仓库地址在这里

关于next-theme和theme-next的关系,参见这个issue

写在前面

目前安装的npm包

npm list 输出如下

1
2
3
4
5
6
7
8
9
10
11
12
13
14
15
16
17
18
19
20
hexo-site#0.0.0 /Users/lhy/workspace/blog
├── hexo-abbrlink#2.2.1
├── hexo-blog-encrypt#3.1.6
├── hexo-deployer-git#3.0.0
├── hexo-filter-nofollow#2.0.2
├── hexo-generator-archive#1.0.0
├── hexo-generator-category#1.0.0
├── hexo-generator-feed#3.0.0
├── hexo-generator-index-pin-top#0.2.2
├── hexo-generator-search#2.4.3
├── hexo-generator-searchdb#1.4.0
├── hexo-generator-sitemap#3.0.1
├── hexo-generator-tag#1.0.0
├── hexo-neat#1.0.9
├── hexo-renderer-ejs#2.0.0
├── hexo-renderer-markdown-it-plus#1.0.4
├── hexo-renderer-stylus#2.1.0
├── hexo-server#3.0.0
├── hexo-theme-next#8.12.1
└── hexo#6.2.0

#替换成@即可

环境搭建

Git

下载git后,检查版本信息

1
git --version

简单配置git用户信息

1
2
git config --global user.name "$YOUR_NAME"
git config --global user.email "$EMAIL_ADDRESS"

生成ssh密钥

1
git ssh-keygen -t rsa -C "$EMAIL_ADDRESS"

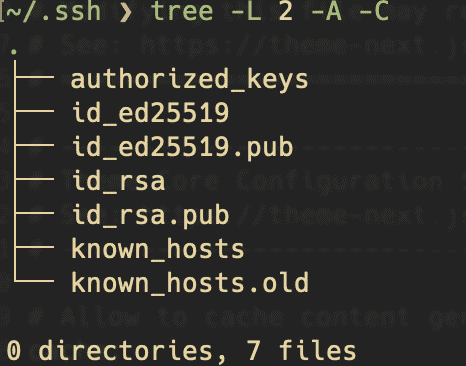
密钥、公钥、信任主机列表一般都保存在~/.ssh/文件夹下

image-20220611153810607

如上图

搭建远程部署环境

目前,静态博客主流的部署方式有两种

一、使用GitHub提供的pages服务

二、自行搭建VPS部署环境

@Sat Jun 11 15:43:44 CST 2022

由于种种原因,目前已经弃用GitHub pages方式,将博客部署在VPS上

Github Pages是GitHub推出的免费SAAS服务,上手简单,能很快地创建一个博客

对于手中没有VPS或者不喜欢折腾的人来说,这是个很好的选择

  1. 在GitHub上创建名为$USER_NAME.github.io的仓库,其中$USER_NAME为自己的GitHub用户名,创建特定名字的仓库后,GitHub会自动启用pages服务
  2. 去域名商处购买一个自己的域名(自用namesilo),并将其托管到域名解析服务商,推荐clouflare,添加域名后按照指引操作即可
  3. 在域名解析服务商的后台添加一条CNAME记录,将购买的域名指向https://$USER_NAME.github.io
  4. 在GitHub上打开步骤1.创建的仓库,在Settings->Pages->Custom domain处填上步骤3.购买的域名,并且勾选下面的Enforce HTTPS按钮

nodjs

方法1. 通过brew下载最新版本-推荐

1
$ brew install node

注意:通过brew也可以下载历史版本的node 例如brew install node#14但是由于node#16之后才支持apple silicon,所以目前没得选

方法2. 官网下载

可以直接去nodejs官网下载,注意确认系统版本号、架构、版本号,不要下载错误的版本
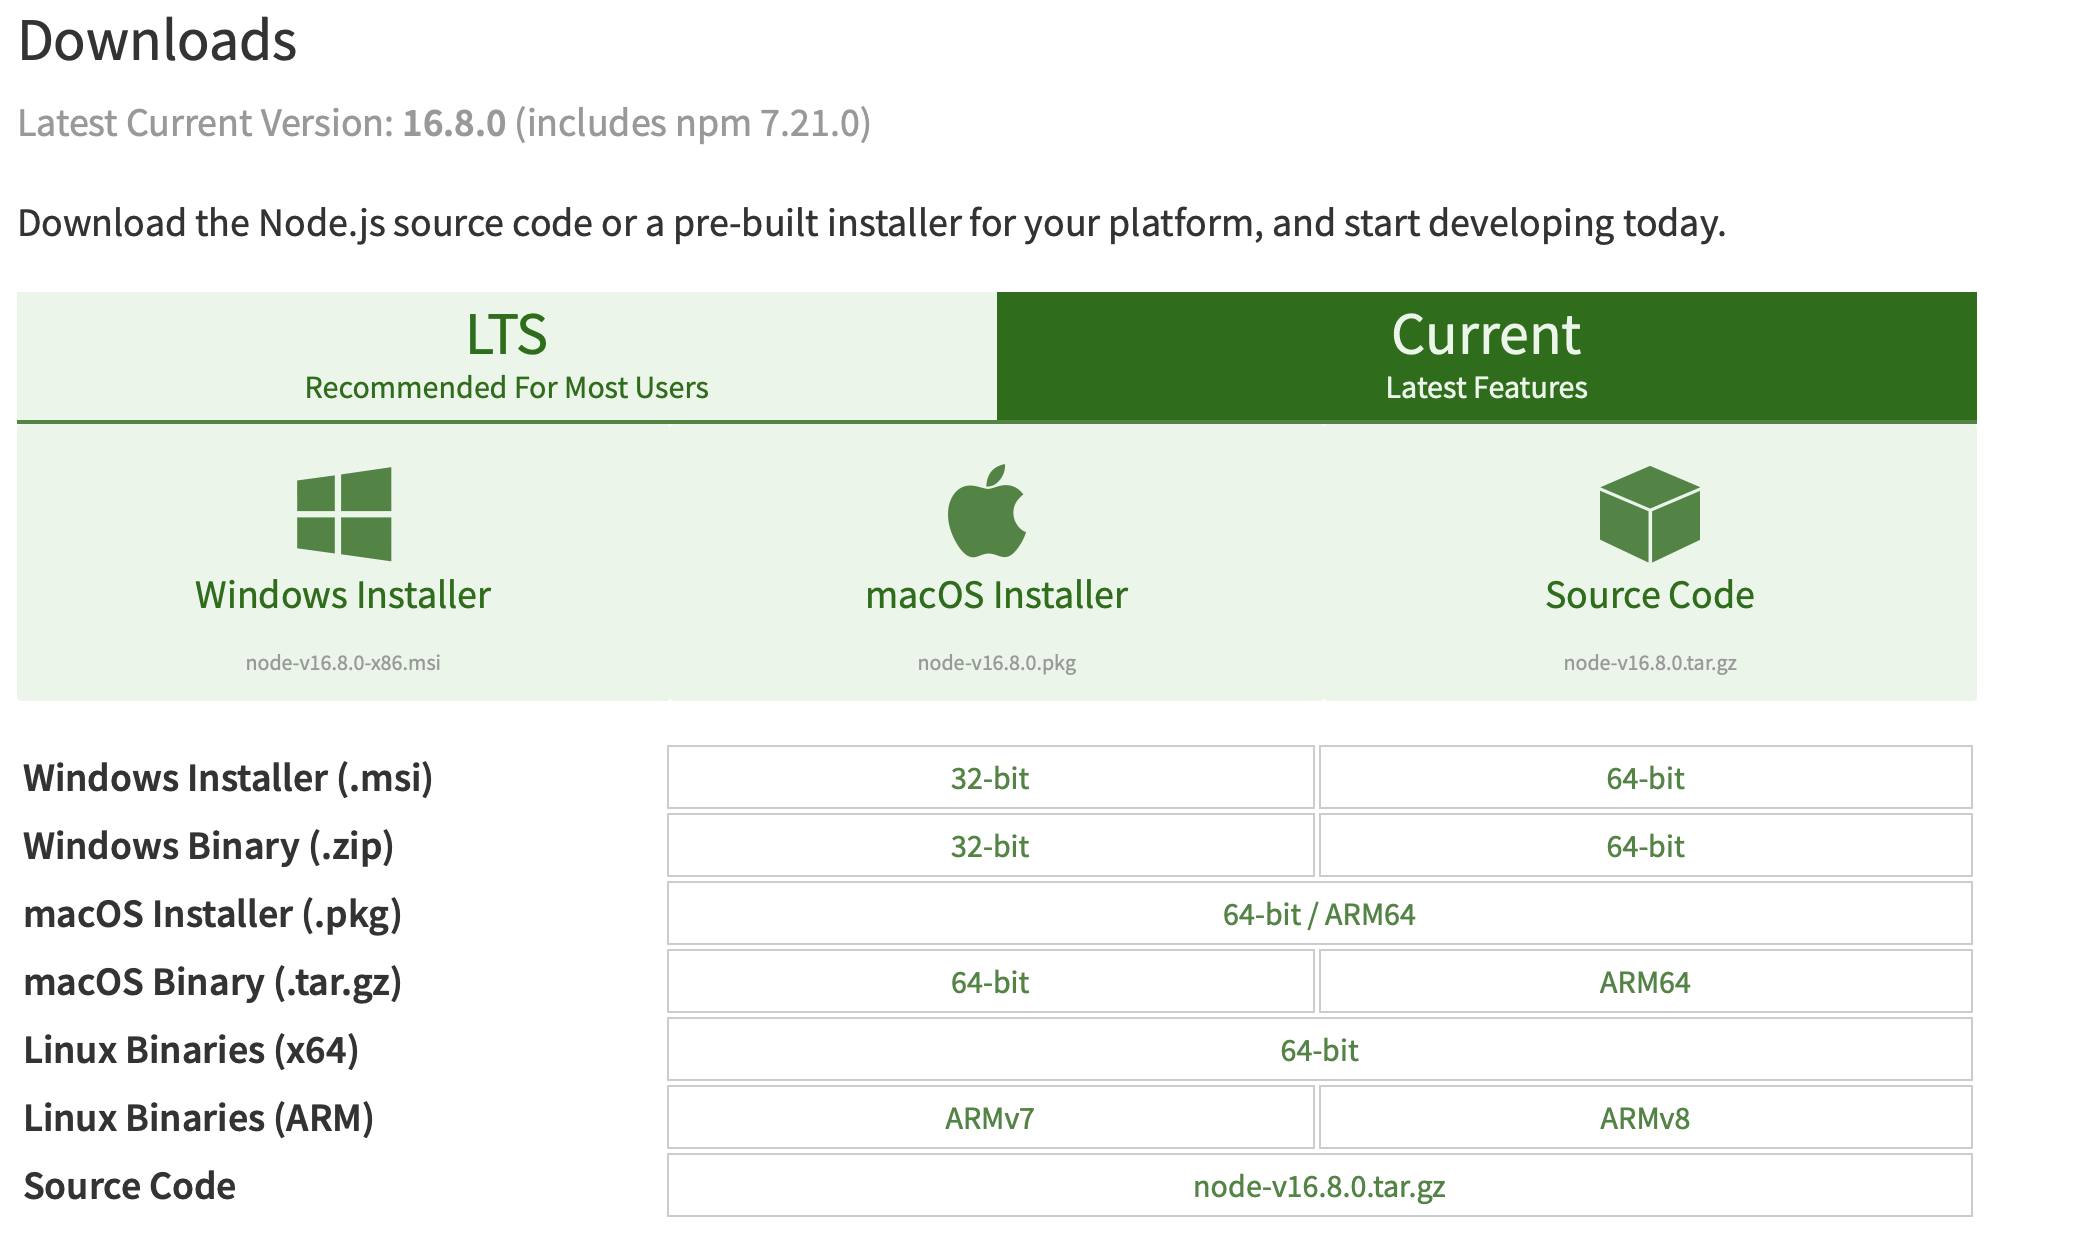
nodejs下载

历史版本下载在这个链接(https://nodejs.org/en/download/releases/)

Hexo框架

为方便起见,使用npm全局安装hexo-cli

1
$ sudo npm install -g hexo-cli

安装完成后,初始化博客的工作目录,位置自定义

1
$ hexo init $HOME/blog

之后可以运行相关命令进行测试

1
2
$ hexo generate
$ hexo deploy

Next主题

方法1. 通过npm下载-推荐

1
2
3
$ cd $HOME/blog  #进入博客根目录
$ npm install hexo-theme-nextA#latest
## '#'换成'@'

方法2. 直接克隆github上的项目仓库

1
2
3
$ cd $HOME/blog  #进入博客根目录
$ git clone https://github.com/next-theme/hexo-theme-next themes/next
$ git pull #更新

Hexo参数设定

前言

hexo相关的参数在博客根目录_config.yml文件中进行设定

博客基本信息

1
2
3
4
5
6
7
8
9
10
# Site
title: #博客名
label:
subtitle: #副标题
label:
description: #对博客的描述
keywords: #关键字
author: Eason #作者
language: zh-CN #博客采用的语言
timezone: Asia/Shanghai #时区
  • 副标题和关键字可留空,其余必填

  • language选项备选值参考主题文件夹/languages/中的文件,默认为en英语,建议设置为zh-CN简体中文

网址

1
2
3
4
5
6
7
# URL
url: https://floatu.top/ #博客网址
permalink: :year/:month/:name/ #文章的超链接格式
permalink_defaults:
pretty_urls:
trailing_index: true # Set to false to remove trailing 'index.html' from permalinks
trailing_html: true # Set to false to remove trailing '.html' from permalinks
  • url处填写为博客设定的域名,即配置远程部署环境中解析的域名

  • permalink处填写的是发表的文章的超链接格式

    其中:name是指文章对应的markdown文件的名字

    超链接中应避免出现中文

@Sat Jun 11 17:13:41 CST 2022 更新

启用hexo-abbrlink插件,以后具体.md文件可以命名为中文

方便本地对文章进行管理,同时网址超链接不会出现中文

主页和归档页面

1
2
3
4
5
6
7
8
9
10
11
12
13
14
# Home page setting
# path: Root path for your blogs index page. (default = '')
# per_page: Posts displayed per page. (0 = disable pagination)
# order_by: Posts order. (Order by date descending by default)
index_generator:
path: '' #默认的主页路径
per_page: 6 #每一页显示的文章数目
order_by: -date

# 归档页面
archive_generator:
per_page: 50 #每一页显示的文章数目
yearly: true
monthly: true
  • index_generator一节中的path属性决定博客的主页路径,即默认的主页网址是https://$DOMAIN/,通过该项可修改为类似https://$DOMAIN/index/https://$DOMAIN/homepage/等形式

  • 可参考Hexo博客-NexT主题自定义主页配置方法这篇文章(@法华寺中班小屁孩),自定义主页

  • ps:上述自定义主页方法只针对post部分,若想高度自定义主页样式,请自行修改主题文件夹/layout/index.njk

主题

1
2
3
4
# Extensions
## Plugins: https://hexo.io/plugins/
## Themes: https://hexo.io/themes/
theme: next

系统默认的主题是lanscape,这里改为了next主题

原因:next主题比较流行,支持丰富的拓展,且文档齐全。流行意味着用户多,提交的bug也多,方便解决问题;支持拓展丰富意味着配置起来简单,文档齐全意味着nb:)

博客部署

1
2
3
4
5
6
7
8
9
10
# Deployment
## Docs: https://hexo.io/docs/one-command-deployment
deploy:
- type: git
repo:
# 使用 github pages
github: git#github.com:hyl-xidian/hyl-xidian.github.io.git #博客仓库的完整路径
# vps
repo: ssh://git#$ip:$port/$repo_path
branch: main #分支名

#替换成@

自动部署功能需要hexo-deploy-git插件,通过npm安装:

1
$ npm install hexo-deployer-git

配置好后,之后就可以通过hexo deploy命令将本地的文章自动部署到远程

Next主题基础配置

官方文档:Elegant and Powerful Theme for Hexo

首先,利用Hexo的新特性(Hexo 5.0 or later),使用The Alternate Theme Config File,即使用 博客根目录 下的_config.[name].yml文件来配置主题

1
$ cp node_modules/hexo-theme-next/_config.yml _config.next.yml

cache and minify

1
2
3
4
cache:
enable: true #开启对content generation的缓存

minify: true #精简content generation

主题风格

1
2
3
4
5
6
7
8
9
# Schemes
#scheme: Muse
#scheme: Mist
#scheme: Pisces
scheme: Gemini #选择喜欢的主题风格,Next官方文档使用的是Gemini

# Dark Mode
darkmode: false #是否开启黑暗模式,可选值:true/false
#这里为了后面自定义样式的统一,关闭了黑暗模式

网站图标

1
2
3
4
5
favicon:
small: /favicon.ico #网站的图标设定
medium: /favicon.ico
apple_touch_icon: /favicon.ico
safari_pinned_tab: /favicon.ico

关于favicon一节,/代表的是博客根目录/source/文件夹,这里是将一个180x180的png图像转化成了ico格式,放入/

格式转化网站(https://www.aconvert.com/cn/icon/png-to-ico/)

菜单栏

1
2
3
4
5
6
7
8
9
menu:
home: /|| fa fa-home
categories: /categories/|| fa fa-th
tags: /tags/|| fa fa-tags
about: /about/|| fa fa-user

menu_settings:
icons: true #显示菜单图标
badges: false

除了homeachieves别的项目都需要手动创建,以tags为例:

1
$ hexo new page tags

然后在博客根目录/source/下会多出一个tags文件夹,里面有一个index.md文件

可以修改index.md文件来简单配置相应页面,例如:在/source/tags/index.md的Front Matter中添加comments: false字段可以关闭标签页面的评论

Dynamic sub-menu within hierarchy structure is also supported. Add your sub-menu items in menu section in theme config file as following:

子菜单(sub-menu)也是同样支持的

注意:每个子菜单需要配置一个默认页面

A default page is required for each sub-menu item.

1
2
3
4
5
6
7
8
9
10
11
12
13
14
menu:
home: / || fa fa-home
archives: /archives/ || fa fa-archive
Docs:
default: /docs/ || fa fa-book
Getting Started:
default: /getting-started/ || fa fa-flag
Installation: /installation.html || fa fa-download
Configuration: /configuration.html || fa fa-wrench
Third Party Services:
default: /third-party-services/ || fa fa-puzzle-piece
Math Equations: /math-equations.html || fa fa-square-root-alt
Comment Systems: /comments.html || fa fa-comment-alt

个人头像

1
2
3
4
5
6
7
8
# Sidebar Avatar
avatar:
# Replace the default image and set the url here.
url: /avatar.jpeg # 头像图片路径 {%博客根目录%}/source/avatar.jpeg
# If true, the avatar will be dispalyed in circle.
rounded: true # 头像被裁切成圆形
# If true, the avatar will be rotated with the cursor.
rotated: false

社交链接

1
2
3
4
5
6
7
8
9
10
11
12
13
14
15
16
17
18
# Social Links
# Usage: `Key: permalink || icon`
# Key is the link label showing to end users.
# Value before `||` delimiter is the target permalink, value after `||` delimiter is the name of Font Awesome icon.
social:
GitHub: https://github.com/hyl-xidian || fab fa-github
E-Mail: mailto:hyl.xidian#gmail.com || fa fa-envelope ## 将`#`替换成`@`
Telegram: https://t.me/lhyDeChannel || fab fa-telegram
RSS: /atom.xml || fas fa-rss

social_icons:
enable: true
E-Mail: mail-bulk # 自定义图标,图标名字在https://fontawesome.com上搜索
Github: github
Telegram: telegram-plane
RSS: rss
icons_only: true # 只显示图标
transition: true

其中RSS订阅需要安装插件hexo-generator-feed

1
$ npm install hexo-generator-feed

并且在博客根目录/_config.yml中添加如下配置:

1
2
3
4
5
6
7
8
9
10
11
12
13
14
# RSS
# https://github.com/hexojs/hexo-generator-feed
feed:
type: atom
path: atom.xml
limit: 20
hub:
content:
content_limit: 140
content_limit_delim: ' '
order_by: -date
icon: icon.png
autodiscovery: true
template:

TOC

1
2
3
4
5
6
7
8
9
10
11
12
# Table of Contents in the Sidebar
# Front-matter variable (unsupport wrap expand_all).
toc:
enable: true
# Automatically add list number to toc.
number: true # 显示数字
# If true, all words will placed on next lines if header width longer then sidebar width.
wrap: false # 不折叠
# If true, all level of TOC in a post will be displayed, rather than the activated part of it.
expand_all: false # 只显示活跃部分的TOC
# Maximum heading depth of generated toc.
max_depth: 6

以上关于TOC的配置是默认的全局配置,具体到每篇文章,可以在文章的Front Matter部分进行个性配置

示例如下:

1
2
3
4
5
6
---
toc:
enable: true
number: false
max_depth: 3
---

以上配置表示该篇文章的TOC不显示数字序号,且最大深度为3

显示修改时间

1
2
3
4
5
6
7
8
9
10
11
12
13
14
15
16
17
# Automatically excerpt description in homepage as preamble text.
excerpt_description: false # 我选择自行写前言,抛弃description字段

# Read more button
# If true, the read more button will be displayed in excerpt section.
read_more_btn: true # 显示‘阅读更多‘按钮

# Post meta display settings
post_meta:
item_text: true
created_at: true # 显示文章创建时间
updated_at: # 显示文章更新时间
enable: true
another_day: true
categories: true # 显示文章分类

tag_icon: true # 使用图标来指示文章底部的标签

杂项配置

显示文章阅读时间

已弃用!!!

1
2
3
4
5
# Post wordcount display settings
# Dependencies: https://github.com/next-theme/hexo-word-counter
symbols_count_time:
separated_meta: true
item_text_total: false

开启此功能需要额外下载一个插件hexo-word-counter

1
$ npm install hexo-word-counter

并且在博客根目录/_config.yml中添加如下配置:

1
2
3
4
5
6
7
8
symbols_count_time:
symbols: true # 开启字符计数
time: true # 显示阅读时间
total_symbols: false # 关闭博客总字符数目
total_time: false # 关闭博客总阅读时间
exclude_codeblock: false
awl: 2
wpm: 275

ps:

  • awl–平均单词长度 默认:4
    • CN≈2
    • EN≈5
  • wpm–每分钟平均阅读单词数目 默认:275

增加文章置顶功能

插件安装

需要额外下载一个插件hexo-generator-index-pin-top

并卸载自带的hexo-generator-index

1
2
npm uninstall hexo-generator-index --save
npm install hexo-generator-index-pin-top --save

设置文章置顶

只需在具体文章的Front matter中添加top: $val字段即可

记得修改博客根目录/scaffolds中的模板文件,使得生成新文章时可以自动创建此字段

top: true或者数字top: 8,即为开启置顶,后者设定了置顶优先级,数字越大优先级越大

增加置顶标志

参考本文章自定义Next主题样式一节

博客根目录/_config.next.yml中增加

1
2
3
4
5
custom_file_path:
#head: source/_data/head.njk
#header: source/_data/header.njk
#sidebar: source/_data/sidebar.njk
postMeta: source/_data/post-meta.njk

post-meta.njk文件内容如下:

1
2
3
4
5
{% if post.top %} 
<span class="post-meta-divider"></span>
<font color=f27c8d><b>置顶</b></font>
<span class="post-meta-divider"></span>
{% endif %}

仅供参考,具体的样式可自由发挥

修改主页文章的排序规则

默认的,主页文章是按照发布时间排序

现在想要修改成:按照文章更新时间排序

解决思路

修改hexo-generator-index-pin-top插件,更改排序规则

具体文件位于博客根目录/node_modules/hexo-generator-index-pin-top/lib/generate.js

修改其中的排序部分代码,将date修改为updated即可

修改后

1
2
3
4
5
6
7
8
9
10
11
12
13
14
15
...
posts.data = posts.data.sort(function(a, b) {
if(a.top && b.top) { // 两篇文章top都有定义
if(a.top == b.top) return b.updated - a.updated; // 若top值一样则按照文章更新日期降序排
else return b.top - a.top; // 否则按照top值降序排
}
else if(a.top && !b.top) { // 只有一篇文章的top字段有定义,那么将有top的排在前面
return -1;
}
else if(!a.top && b.top) {
return 1;
}
else return b.updated - a.updated; // 都没定义则按照文章更新日期降序排
});
...

由于此部分涉及到对具体组件的修改,更新或者在新环境创作时,修改失效,很不优雅

编写一键初始化脚本实现

以下完成的功能是替换js中的.date字段为.updated

1
2
3
4
echo "修改hexo-generator-index-pin-top插件,使首页文章按照更新时间排序..."
pluginPath1="$blogRootPath/node_modules/hexo-generator-index-pin-top/lib"
cd $pluginPath1
sed -i '' "s/\.date/\.updated/g" generator.js &>/dev/null

此部分集成于完整的初始化脚本中,此脚本目前尚未开源,有需要的朋友请留言

开启对CDN资源的预连接

Next主题支持提前链接字体插件的CDN资源,可以提高整体加载速度

The preconnect link relation type is used to indicate an origin that will be used to fetch required resources. Initiating an early connection, which includes the DNS lookup, TCP handshake, and optional TLS negotiation, allows the user agent to mask the high latency costs of establishing a connection.

1
preconnect: true

代码块风格

Next8.0版本后支持highlight.jsprism两种渲染引擎,具体的高亮渲染效果可以通过Next Hightlight Theme Preview查看

选择启用哪个引擎在博客根目录/_config.yml# Writting一节进行配置:

1
2
3
4
5
6
7
8
9
10
11
12
highlight:
enable: true
line_number: true
auto_detect: true
tab_replace: ''
wrap: true
hljs: false
prismjs:
enable: false
preprocess: true
line_number: true
tab_replace: ''

高亮主题在博客根目录/_config_next.yaml中配置:

1
2
3
4
5
6
7
8
9
10
11
12
13
14
15
16
17
18
codeblock:
# Code Highlight theme
# All available themes: https://theme-next.js.org/highlight/
#
# modify the config file in hexo-site folder to decide which engine to choose
#
# https://theme-next.js.org/highlight/
theme:
light: a11y-light
dark: a11y-dark
prism:
light: prism
dark: prism-dark
# Add copy button on codeblock
copy_button:
enable: true
# Available values: default | flat | mac
style: mac

返回顶部按钮和阅读进度条

移动端上,默认不显示sidebar

1
2
3
4
5
6
7
8
9
10
11
12
13
14
15
16
17
back2top:
enable: true # 开启返回顶部按钮
# Back to top in sidebar.
sidebar: false # 集成到sidebar中
# Scroll percent label in b2t button.
scrollpercent: true # 显示滚动百分比

# Reading progress bar
reading_progress:
enable: true # 开启阅读进度条
# Available values: left | right
start_at: left # 从左侧开始生长
# Available values: top | bottom
position: top # 进度条位置设定在顶部
reversed: false
color: "#2f3f5b" # 自定义颜色
height: 2.5px # 进度条的“厚度”

字体设置

Next主题默认的fonts hosthttps://fonts.googleapis.com,为了使国内访问更加稳定,选择googleapis的国内CDN进行替换

参考前端 CDNJS 库及 Google Fonts、Ajax 和 Gravatar 国内加速服务

博客根目录/_config_next.yml中配置如下:

@Sat Jun 18 19:13:28 CST 2022

不再使用谷歌字体

以下配置仅供参考

1
2
3
4
5
6
7
8
9
10
11
12
13
14
15
16
17
18
19
20
21
font:
enable: false

# Uri of fonts host, e.g. https://fonts.googleapis.com (Default).
host: //fonts.loli.net

# Font options:
# `external: true` will load this font family from `host` above.
# `family: Times New Roman`. Without any quotes.
# `size: x.x`. Use `em` as unit. Default: 1 (16px)

# Global font settings used for all elements inside <body>.
global:
external: true
family: Noto Sans SC
size:

# Font settings for <code> and code blocks.
codes:
external: true
family: Roboto Mono

可以在Google fonts挑选自己喜欢的字体,将名字填到family字段处即可,注意名字不能写错!

详细配置方法参考官方文档

SEO-生成固定链接

搜索引擎优化

info,百度蜘蛛抓取网页的规则: 对于蜘蛛说网页权重越高、信用度越高抓取越频繁,例如网站的首页和内页。蜘蛛先抓取网站的首页,因为首页权重更高,并且大部分的链接都是指向首页。然后通过首页抓取网站的内页,并不是所有内页蜘蛛都会去抓取。

success,搜索引擎认为对于一般的中小型站点,3层足够承受所有的内容了,所以蜘蛛经常抓取的内容是前三层,而超过三层的内容蜘蛛认为那些内容并不重要,所以不经常爬取。出于这个原因所以permalink后面跟着的最好不要超过2个斜杠。

使用插件hexo-abbrlink生成文章固定链接

1
npm install hexo-abbrlink --save

修改博客根目录/_config.yml

1
2
3
4
5
6
7
8
9
10
11
12
13
14
15
16
# 设置永久链接
# permalink: :year/:month/:name/
permalink: posts/:abbrlink.html # 记得带上html后缀
abbrlink:
alg: crc16 #算法: crc16(default) and crc32
rep: hex #进制: dec(default) and hex
drafts: false #(true)Process draft,(false)Do not process draft. false(default)
# Generate categories from directory-tree
# depth: the max_depth of directory-tree you want to generate, should > 0
auto_category:
enable: false #true(default)
depth: #3(default)
over_write: false
auto_title: false #enable auto title, it can auto fill the title by path
auto_date: false #enable auto date, it can auto fill the date by time today
force: false #enable force mode,in this mode, the plugin will ignore the cache, and calc the abbrlink for every post even it already had abbrlink.

PS:

记得注释掉之前的permalink设置

记得修改博客根目录/scaffolds中的模板文件,在Front matter中增加`abbrlink:

第三方服务配置

数学公式支持

Next主题支持mathjaxkatex两种数学公式渲染引擎,结合实际渲染效果和配置过程,最终决定选用Katex引擎

KaTeX is a faster math rendering engine compared to MathJax 3. And it could survive without JavaScript. But, for now KaTeX supports less features than MathJax. Here is a list of TeX functions supported by KaTeX.

博客根目录 /_config.next.yml中的math一节进行配置:

1
2
3
4
5
6
7
8
9
10
11
12
13
math:
every_page: false # false:代表着只有在front-matter部分配置了mathjax: true的文章才会加载katex脚本
# 若设置为true,则每篇文章都会自动加载katex脚本

mathjax:
enable: false
# Available values: none | ams | all
tags: ams

katex:
enable: true # 这里选择启用katex渲染引擎
# See: https://github.com/KaTeX/KaTeX/tree/main/contrib/copy-tex
copy_tex: true # Katex的插件

ps:简单来说,copy_tex插件可以使得在复制网页上被katex引擎渲染后的元素(公式)时,剪贴板中保存内容会转化为$符号包围的源表达式

例如:

x=b±b24ac2ax=\frac{-b\pm\sqrt{b^2-4ac}}{2a}

在网页上复制后,剪贴板保存的内容会是

1
$x=\frac{-b\pm\sqrt{b^2-4ac}}{2a}$

启用katex需要卸载原有的渲染器,并安装新的渲染插件:

1
2
3
$ cd $HOME/blog
$ npm un hexo-renderer-marked
$ npm i hexo-renderer-markdown-it-plus

关于用katex写数学公式的语法,可以参考

@李乾文的译文——KaTeX数学公式语法

提升网页浏览体验的插件

pjax

It allows you to completely transform the user experience of standard websites (server-side generated or static ones) to make users feel like they are browsing an app, especially for those with low bandwidth connections.

如果对具体原理感兴趣的话可以访问Github主页进行了解,在博客根目录/_config.next.yml中配置启用:

1
2
3
# Easily enable fast Ajax navigation on your website.
# For more information: https://github.com/next-theme/pjax
pjax: true

lazy load

顾名思义,lozad.js可以实现对网页元素的“懒加载”,即浏览到相应元素时才会加载,对于一些体积较大的网页,会极大地提升整体加载速度

Highly performant, light and configurable lazy loader in pure JS with no dependencies for images, iframes and more, using IntersectionObserver API

插件演示参见(https://apoorv.pro/lozad.js/demo/)

博客根目录/_config.next.yml中配置启用:

1
2
3
# Vanilla JavaScript plugin for lazyloading images.
# For more information: https://apoorv.pro/lozad.js/demo/
lazyload: true

Fancybox-图片浏览

Next主题支持fancybox插件,开启后允许以新视窗优雅地浏览文章中的图片、视频

Fancybox saves you time and helps to easily create beautiful, modern overlay windows containing images, iframes, videos or any kind of HTML content.

Fancybox可以节省您的时间,并帮助您轻松创建包含图像、iFrame、视频或任何HTML内容的漂亮、现代的覆盖窗口

博客根目录/_config.next.yml中配置启用:

1
2
3
# FancyBox is a tool that offers a nice and elegant way to add zooming functionality for images.
# For more information: https://fancyapps.com/fancybox/
fancybox: true

Pace-显示加载进度条

Next 8.7.1更新中,移除了nprogress,添加了pace.js

Pace will automatically monitor your ajax requests, event loop lag, document ready state, and elements on your page to decide the progress. On ajax navigation it will begin again!

博客根目录/_config.next.yml中配置启用:

1
2
3
4
5
6
7
8
9
10
pace:
enable: true
# All available colors:
# black | blue | green | orange | pink | purple | red | silver | white | yellow
color: orange # 选择进度条的颜色
# All available themes:
# big-counter | bounce | barber-shop | center-atom | center-circle | center-radar | center-simple
# corner-indicator | fill-left | flat-top | flash | loading-bar | mac-osx | material | minimal
theme: minimal # 选择进度条的风格
# 建议挨个尝试一下

评论系统

本博客已弃用Gitalk

目前使用 utterances

配置方法参考

Next支持Disqus、Gitalk、畅言等评论系统(之前较为流行的valine闭源了,Next团队放弃了对该系统的支持),这里选择使用Gitalk

Gitalk 是一个基于 GitHub Issue 和 Preact 开发的评论插件

特性

  • 使用 GitHub 登录
  • 支持多语言 [en, zh-CN, zh-TW, es-ES, fr, ru, de, pl, ko, fa, ja]
  • 支持个人或组织
  • 无干扰模式(设置 distractionFreeMode 为 true 开启)
  • 快捷键提交评论 (cmd|ctrl + enter)

博客根目录/_config.next.yml中启用:

1
2
3
4
5
6
7
8
9
10
11
12
13
14
15
16
17
18
# Multiple Comment System Support
comments:
# Available values: tabs | buttons
style: buttons
# Choose a comment system to be displayed by default.
# Available values: disqus | disqusjs | changyan | livere | gitalk | utterances
active: gitalk
# Setting `true` means remembering the comment system selected by the visitor.
storage: true
# Lazyload all comment systems.
lazyload: true
# Modify texts or order for any navs, here are some examples.
nav:
#disqus:
# text: Load Disqus
# order: -1
gitalk:
order: -2

配置方法

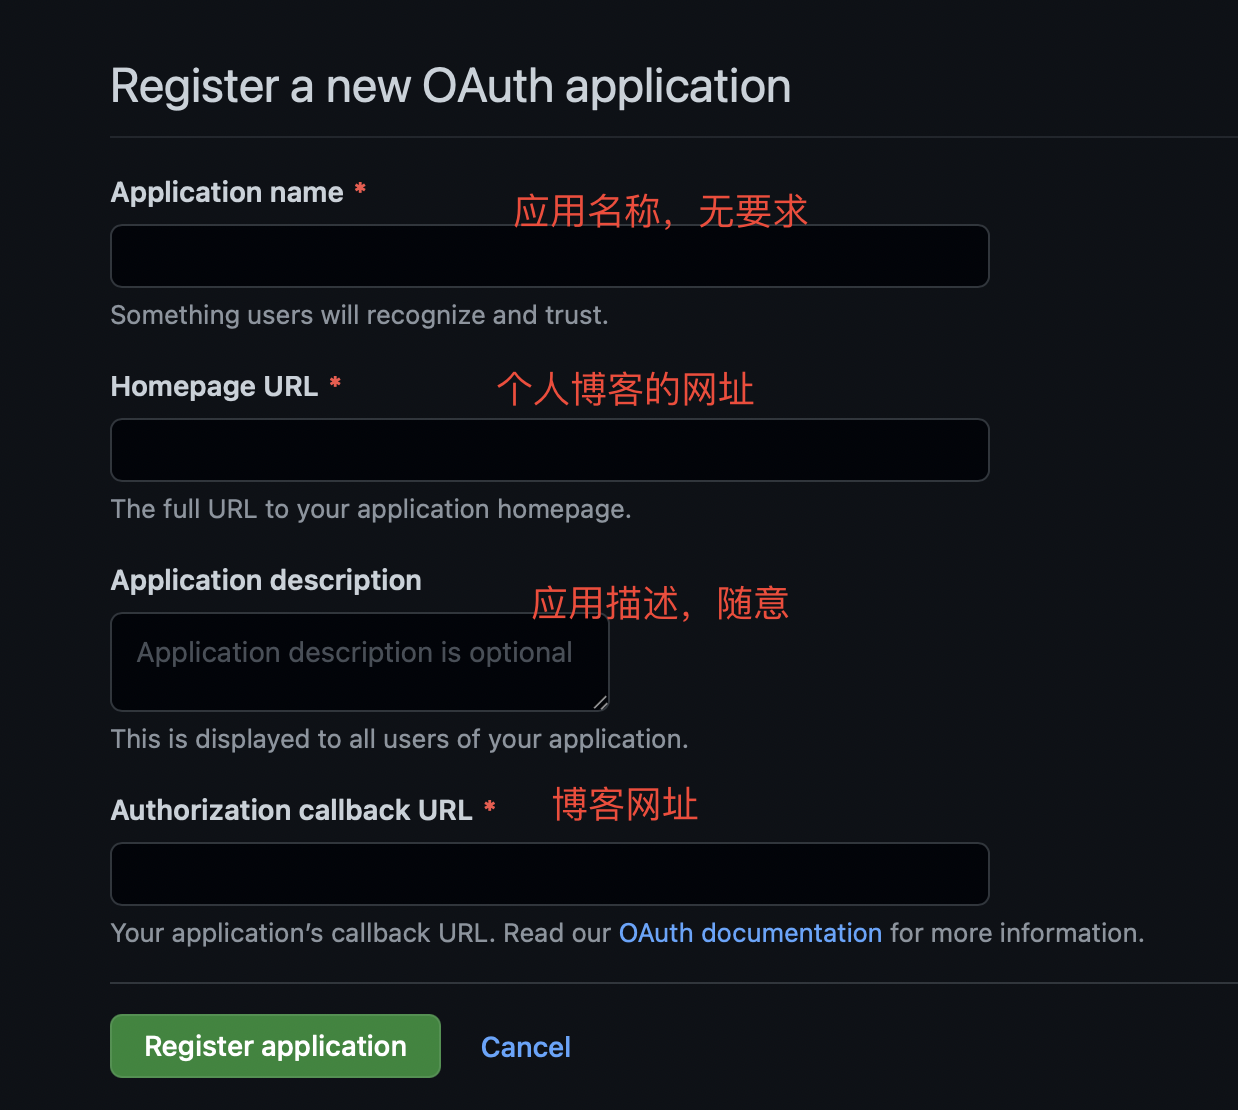
  1. 首先点击此链接,在GitHub上注册一个新的OAuth应用

    OAuth应用注册说明
  2. 注册之后去GitHub上Settings->Developr Settings->OAuth Apps获取应用的Client IDClient Secret

  3. 创建一个仓库来存储Gitalk的评论(Gitalk评论系统是利用了GitHub的issue特性)

  4. 博客根目录/_config.next.ymlgitalk一节进行配置:

1
2
3
4
5
6
7
8
9
10
11
12
13
14
15
16
# Gitalk
# For more information: https://gitalk.github.io
gitalk:
enable: true
github_id: # GitHub repo owner
repo: # Repository name to store issues
client_id: # GitHub Application Client ID
client_secret: # GitHub Application Client Secret
admin_user: # GitHub repo owner and collaborators, only these guys can initialize gitHub issues
distraction_free_mode: true # Facebook-like distraction free mode
# When the official proxy is not available, you can change it to your own proxy address
proxy: https://cors-anywhere.azm.workers.dev/https://github.com/login/oauth/access_token # This is official proxy adress
# Gitalk's display language depends on user's browser or system environment
# If you want everyone visiting your site to see a uniform language, you can set a force language value
# Available values: en | es-ES | fr | ru | zh-CN | zh-TW
language:

博客内搜索服务

这部分采用Next自带的本地搜索服务,本地搜索不需要任何外部第三方服务,可以通过搜索引擎进行额外索引

配置方法

  1. 博客根目录中安装相应插件

    1
    $ npm i hexo-generator-searchdb
  2. 在Hexo配置文件博客根目录/_config.yml中添加如下内容:

    1
    2
    3
    4
    5
    search:
    path: search.xml
    field: post
    content: true
    format: html
  3. 在Next主题配置文件博客根目录/_config.next.yml中添加如下内容:

    1
    2
    3
    4
    5
    6
    7
    8
    9
    10
    11
    12
    13
    # Local Search
    # Dependencies: https://github.com/next-theme/hexo-generator-searchdb
    local_search:
    enable: true
    # If auto, trigger search by changing input.
    # If manual, trigger search by pressing enter key or search button.
    trigger: auto
    # Show top n results per article, show all results by setting to -1
    top_n_per_article: 1
    # Unescape html strings to the readable one.
    unescape: false
    # Preload the search data when the page loads.
    preload: true # 预加载搜索数据

CDN配置

第三方插件

配置CDN可以使得第三方插件的静态资源加载速度更快,而Next主题在8.0之后版本可以为所有第三方插件统一设置CDN提供商,参见vendors一节:

1
2
3
4
5
6
7
8
9
10
11
12
13
14
15
16
17
vendors:
# The CDN provider of NexT internal scripts.
# Available values: local | jsdelivr | unpkg | cdnjs
# Warning: If you are using the latest main branch of NexT, please set `internal: local`
internal: local
# The default CDN provider of third-party plugins.
# Available values: local | jsdelivr | unpkg | cdnjs
# Dependencies for `plugins: local`: https://github.com/next-theme/plugins
plugins: cdnjs

# 在以下设置中,可以为每个插件指定CDN提供商
# 如果留空,则默认启用上面 plugins选项提供的CDN

anime:
...
pjax:
...

也可以使用定制的CDN提供商

例如:Baomitu(360)、Staticfile(七牛云)、BootCDN

先将 internal: 或者 plugins: 字段设置为 custom

然后配置 custom_cdn_url:

1
2
3
4
5
6
7
8
9
vendors:
internal: custom
# The default CDN provider of third-party plugins.
# Default: cdnjs
plugins: custom
# 七牛云
custom_cdn_url: https://cdn.staticfile.org/${cdnjs_name}/${version}/${cdnjs_file}
# # 360
# custom_cdn_url: https://lib.baomitu.com/${cdnjs_name}/${version}/${cdnjs_file}

全部资源

jsdelivr在中国大陆的牌照已经被吊销,请谨慎设置!

此设置的前提是将生成的网站文件夹/public上传到github远程仓库中

目前本博客已经弃用jsdelivr

直接将网站的css、js和images资源全部走CDN,博客根目录/_config.next.yml中配置如下:

1
2
3
4
5
# Assets
# Accelerate delivery of static files using a CDN
css: //cdn.jsdelivr.net/gh/hyl-xidian/hyl-xidian.github.io@main/css
js: //cdn.jsdelivr.net/gh/hyl-xidian/hyl-xidian.github.io@main/js
images: //cdn.jsdelivr.net/gh/hyl-xidian/hyl-xidian.github.io@main/images

将相应位置修改成自己的GitHub用户名即可

jsdelivr官方示例如下:

jsdelivr GitHub资源配置示例

自定义Next主题样式

Next主题自从Pull Request #868后仅保留 在主题配置文件中指定自定义文件 的方式来进行客制化

博客根目录/_config.next.yml中修改以下字段:

1
2
3
4
5
6
# Define custom file paths.
# Create your custom files in site directory `source/_data` and uncomment needed files below.
custom_file_path:
postBodyEnd: source/_data/post-body-end.njk
variable: source/_data/variables.styl
style: source/_data/styles.styl

在这些文件中的配置会覆盖掉源文件中的设定,这种方式可以保证在增加自定义的内容时,不会修改主题的源文件

其中,styles.styl主要自定义了博客的样式,variables.styl自定义一些变量的值,例如:文章背景色等

  1. 可以在博客根目录下使用fzfripgrep对所有文件内容进行模糊查询,可以快速定位到要修改的内容

这一步操作我利用安装了fzf插件的nvim来完成的

  1. RGB颜色值参考可以使用这个在线工具

先举几个例子:

  1. 博客根目录/source/_data/styles.styl中主要进行博客风格的配置,例如:
1
2
3
4
5
6
7
8
9
10
// 自定义分割线的风格 "---
hr {
background-image: repeating-linear-gradient(-45deg, #008086, #008086 4px, transparent 4px, transparent 8px);
}

// 网站描述文字的颜色和到边缘的距离
.site-description {
color: #696969;
margin-top: 15px;
}

以上第一节将markdwom中的分割线风格自定义成了主色为#2f3f5b的间断的横线,如下所示:


第二节定义的是网站的描述文字,即Hexo配置文件博客根目录/_config.yml# Site一节description:字段后的内容,自定义了该内容的字体颜色为#696969和到上边缘的间距为15px具体效果点击左侧站点概览后进行察看

  1. 博客根目录/source/_data/variables.styl中是自定义的各种变量值,例如:
1
2
$content-bg-color = #F0FFFF;
$table-row-odd-bg-color = #FFFFF0;

以上自定义了博客内文章内容的背景色为#F0FFFF,表格奇数行的颜色为#FFFFF0(并不是当前采取方案)

  1. 目前博客根目录/source/_data/post-body-end.njk文件的内容为:
1
2
3
4
5
<div class="post-block">
{% if not is_index and theme.passage_end_tag.enabled %}
<div style="text-align:center;color:#696969;font-size:14px;">{{theme.passage_end_tag.content}}</div>
{% endif %}
</div>

实现功能为:在文章末尾添加一个结束标志,具体内容需在主题配置文件添加类似如下内容:

1
2
3
passage_end_tag:
enabled: true
content: ------------- ❤️ -------------

本博客的样式设计基于muzi的博客修改而来

👉 完整的styles.styl,仅供参考

参考链接

  1. Documentation | Theme for Hexo

  2. Next主题中添加首页文章置顶功能及置顶图标

  3. SEO优化:Hexo-abbrlink插件生成永久固定链接


📔博文图谱

提及本博文的链接